先週、若い夫婦から電話があった。声は不満に満ちていた。彼らはハノイの自宅に高齢の親を呼び寄せたばかりだったが、唯一のバスルームが二階にあったのだ。.
両親が階段で苦労することを思うと常に心配だったが、新しい配管のためにコンクリートの床をジャックハンマーで壊すという考えは、さらに大きな悪夢のように思われた。.
ご家族のニーズにぴったり合わない家で、どれほどストレスを感じるか、よくわかります。良いニュースは、家の元の配管レイアウトに縛られる必要はないということです。.
ご家族には、ディスポーザー付きトイレがあれば、地下室など、従来の配管が難しい場所にもほぼどこにでも浴室を追加できるといつもお伝えしています。私の経験上、ディスポーザー付きトイレは、従来の配管が実現不可能な改築プロジェクトに最適です。.
数ヶ月にわたる建設を回避する解決策があり、それはほとんどの人が考えるよりも簡単です。.
アップフラッシュトイレとは何か、そしてそれがなぜ画期的なのか
心から、最良の解決策は、よりハードにではなく、よりスマートに機能するものであることが多いです。従来のトイレは、床下にある重力と大きな配管を必要とします。しかし、アフラッシュトイレは、その常識を完全に覆します。.
重力に頼るのではなく、マセレーターポンプを使用して、排泄物やトイレットペーパーを細かいスラリー状に粉砕します。〜によると 今日のホームオーナー (2025年)、これにより、廃棄物を小口径配管で主流の排水管に圧送することができます。.
これにより、地下室、屋根裏部屋、ガレージ、またはコンクリートスラブの上に建てられた部屋に最適な選択肢となります。アップフラッシュトイレは、床を壊すことなく、使えない空間を貴重な居住空間に変えます。.
実は, ホームバスレビュー(2025) この方法により、ベトナム全土のプロジェクトで私が確認してきた通り、従来の配管の引き直しに比べて設置コストを削減できることがわかります。.
アップフラッシュトイレはどのように重力の限界を回避するのか
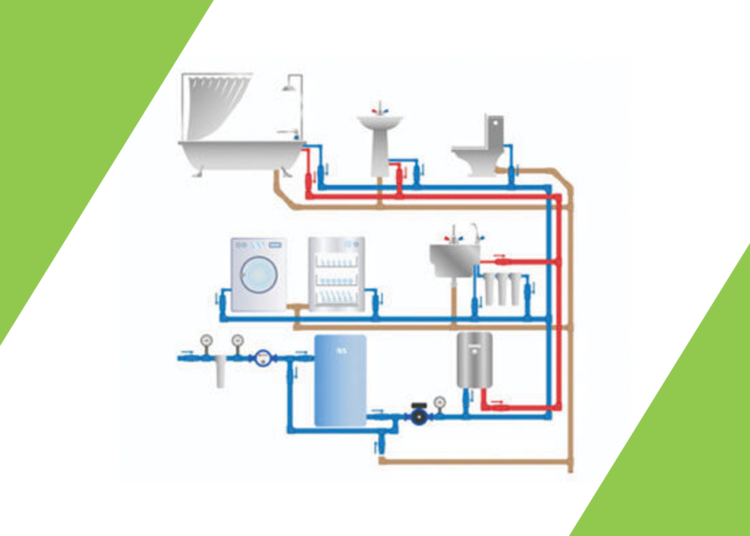
アップフラッシュトイレが重力に逆らう簡単な仕組みは以下の通りです。水を流すと、汚物が密閉されたユニットに入り、そこでマセレーターまたはグラインダーポンプが細かなスラリー状にします。その後、強力なポンプがこのスラリーを細い配管を通して上の本管下水道へ送り出します。.
ポンプが全ての作業を行うため、重力や従来の床下配管は必要ありません。これは、別の種類のシステムである汚水排出ポンプとは異なる点であることに注意することが重要です。.
アップフラッシュ式トイレ vs. 標準トイレ:配管がない場所ではどちらが優れているか
標準的なトイレは、そのすぐ下にある太い排水管に完全に依存しています。フラッシュアップシステムは独立しています。このため、地下室、屋根裏部屋、ガレージ、またはコンクリートスラブの上に建てられた部屋に唯一実用的な選択肢となります。.
アップフラッシュトイレは、従来の配管が不可能な改修プロジェクトに特に理想的です。アップフラッシュトイレの中には、トイレに加えてシンクやシャワーからの排水も処理できるコンボユニットとして提供されているものもあります。.
アップフラッシュトイレは、床を壊さずに、使えないスペースを価値のある居住空間に変えます。.
ベトナムにおけるアップフラッシュトイレ設置の費用見積もり
| アイテム | 見積もり費用 (ベトナムドン) | メモ |
|---|---|---|
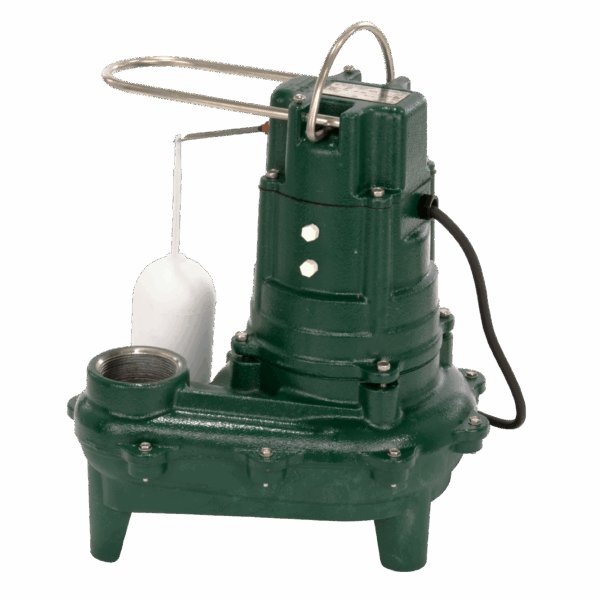
| アップフラッシュトイレシステム | 12,000,000 – 22,000,000 | マセレーターポンプとトイレを含む(例:Zoeller Qwik Jon、Saniflo Saniaccess 3)。. |
| PVC排出ホース (10m) | 500,000 – 1,000,000 | 下水道管の距離に応じて、スケジュール40 PVC、3/4インチまたは1インチ. |
| チェックバルブ | 300,000 – 600,000 | 逆流防止弁:真鍮製またはPVC製。. |
| 電気設備(GFCIコンセント) | 1,000,000 – 2,000,000 | 電気工賃およびGFCIコンセント設置費を含む。. |
| 専門業者による設置(取付工事) | 2,000,000 – 5,000,000 | 4〜8時間。DIYならこの費用は不要です。. |
| 付属品(ホース、クランプ) | 200,000 – 500,000 | フレキシブルホース、ホースクランプ、ポンプ接続用アダプター. |
| 総推定費用 | 16,000,000 – 31,100,000 | 許可証や追加の配管(例:シンク/シャワーコンボユニット)は除きます。. |
メモ: 費用見積もりは、Saniflo、Zoeller Pumps、およびBig Frog Supplyによる2023~2024年の世界価格を基に、ベトナムの年間インフレ率(4~5%)(世界銀行)およびハノイの都市部市場動向を反映して調整したものです。 現地のサプライヤーデータ(例:PVCパイプのHoa Sen Group)およびハノイの電気工事費も考慮しました。正確な費用については、Zoeller Vietnamまたは現地の配管資材サプライヤーにお問い合わせください。.
設置前のチェックリスト:すべての住宅所有者が従うべきこと
何千もの設置作業から学んだことは、入念な準備がスムーズで安心なプロセスの鍵であるということです。これらの詳細に先に注意を払うことで、すべてが変わります。.
- 設置を開始する前に、必ずスペースと配管の長さを測定し、適切なフィット感と位置合わせを確保してください。.
- 設置を開始する前に、設置要件と地域の規制をすべて確認する必要があります。.
- 設置作業を開始する前に、すべての配管接続部と内部コンポーネントに容易にアクセスできることを確認してください。.
- 設置を開始する前に、換気要件を確認し、換気管に適した場所をチェックしてください。.
- メインの排水管がより遠くにある場合は、アップフラッシュシステムに接続するための延長配管を計画してください。.
ステップバイステップのビジュアルガイド
Zoeller Qwik Jon の実際の設置方法を視聴するには、以下をご覧ください。 https://vn.zoeller.com/videos/. それを見れば、いかに簡単なことかがよくわかります。.
アップフラッシュトイレの設置方法(ステップ・バイ・ステップ)
クライアントにとって、システム導入がどれほど早く完了するかを目の当たりにした時、すべてがうまくいくと感じるものです。数ヶ月にわたる混乱の必要はありません。.
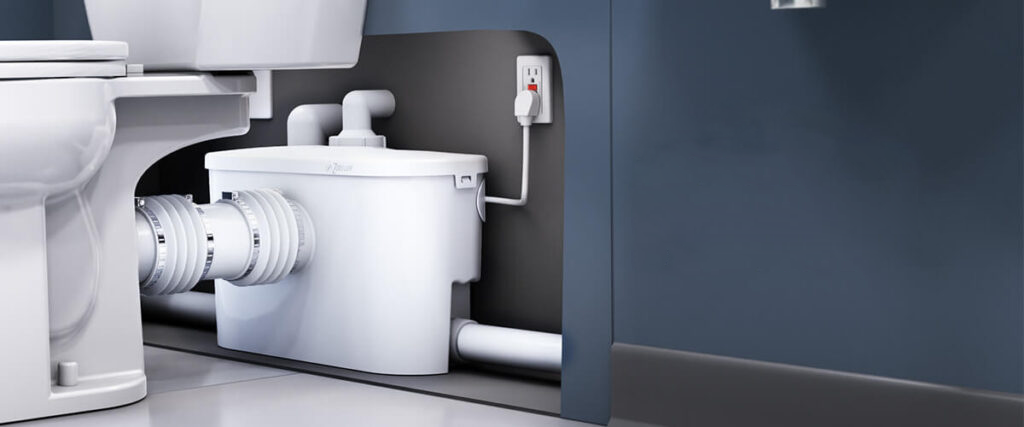
- マーカーレイアウトと位置マセレーターユニットを正確に配置する まず、トイレとポンプユニットを設置したい場所に正確に設置します。Zoeller Qwik Jonの一般的なレイアウトはシンプルで、ポンプは便器の後ろに目立たないように設置されます。.
- 排出を垂直または側方線に接続する 小さな排水管を接続し、本下水管まで配管します。本下水管が遠い場合は、延長管を使用して届かせることができます。この管は壁や天井の中に隠せるほどの小ささです。フレキシブルホースを使用することで、便器とポンプまたは排水管を接続でき、位置合わせや設置が容易になります。.
- 逆止弁を吐出ラインに取り付ける 逆流がファウラーシステムに戻るのを防ぐために、排出ラインに逆止弁を取り付けることが重要です。.
- 電気接続 – 接続のセキュリティを確認してください: ここでの接続の安全性はすべてです。ポンプはGFCIと呼ばれる特別な安全コンセントに差し込む必要があります。このコンセントは、人間に電気的な問題から保護するために特別に設計されており、問題が検出されるとすぐに電源を遮断します。このシンプルでありながら不可欠な接続により、ご家族は安心して新しいバスルームを使用できます。.
- フィッティングの取り付け、密閉、固定 すべての継手は、水密で恒久的な設置を確実にするために、取り付け、密閉、および締め付けられています。.
- ファーストフラッシュテストを実行してください: 最終段階は、テストです。ポンプが静かに作動し、全く漏れがないことを確認するために、何度かトイレの水を流します。.
YouTubeでZoeller Qwik Jon®の公式取り付けビデオを見つけて、始める前に自信をつけましょう。 https://www.youtube.com/watch?v=kX4XZ-kU-f0
最終システムチェック:続行する前に確認すべきこと
検証が成功しました。続行する前に最終接続を待っています。
すべての接合部をシールし、電源を接続すれば、設置作業は実質的に完了です。これは私が「検証完了」と呼ぶ瞬間であり、最初のフラッシュ(洗浄)の前に最後の1ステップを待つだけです。.
最終接続を終えた後、数分間一時停止します。電源ブレーカーが入っているか、ホースクランプがすべてしっかりと締まっているか、ポンプが完璧に静かに動作しているかを確認します。この短い待機時間は、システムに最初の水滴を送る前に、すぐに気づくべき問題がないかを確認するチャンスです。.
システムが応答しない場合は、まず以下の点を確認してください。
新しいシステムが一度で応答しないことがありますが、それがどれほど残念なことか想像できます。しかし、良いニュースは、その修正はほとんどの場合非常に簡単なことです。まず確認すべきことは次のとおりです。
- 電源 ポンプはしっかりと差し込まれていますか? GFCIコンセントはトリップしましたか? リセットボタンを単純に押すだけで問題が解決することがよくあります。.
- ウォーターバルブ トイレタンクへの給水バルブは全開ですか?
- 詰まり ベント管は詰まっていますか?
よくある質問
アップフラッシュトイレは実際どのくらい持つの?
私の経験では、適切な手入れをすれば、品質システムは従来のトイレに匹敵する10年から15年持ちます。私が設置するZoellerのユニットはこの基準で製造されています。.
モンスーンの季節や停電時にも使えますか?
はい、どちらの状況でも機能します。密閉システムはモンスーン期の地下水の影響を受けません。停電時にはバケツで手動でフラッシュでき、電力が復旧するまでユニットが安全に廃棄物を保持します。.
シンクとシャワーを同じポンプに接続できますか?
はい、もちろんです。現代の多くのシステムは、シンクとシャワーの両方を扱える「コンボユニット」です。例えば、私が使用しているZoeller Qwik Jonモデルは、これを目的として設計されており、どこにでも完全なバスルームを設置できます。.
あわせて読む: 現代のベトナムの都市住宅向けスマートフラッシュトイレの選択肢
この記事は、配管およびポンプ技術で15年の経験を持つ、ゾーラー・ベトナムのライセンス取得マスター配管工兼テクニカル・コンテンツ・スペシャリストであるTân Nguyễn氏によるものです。.
開示私はZoeller Vietnamのテクニカルスペシャリストであり、アップフラッシュトイレシステムを日常的に扱っています。この記事にはZoeller製品への言及が含まれていますが、共有されている洞察は現場での私の個人的な経験に基づいたものであり、このコンテンツに対する報酬によって影響を受けたものではありません。.