
Author: Bao Ngo
A correctly fitted sewage pump protects buildings from flooding, handles wastewater reliably, and delivers years of low-maintenance service. Poor fitting (wrong positioning, faulty wiring, or an incorrectly calibrated level controller) causes premature failure and avoidable repair bills. This article covers how to install this type of submersible pump correctly, from site assessment and plumbing through power supply wiring, level control setup, commissioning, and routine upkeep. Whether you are working on a residential sump pit, a commercial wet well, or an industrial sewage treatment system, the same core steps apply.
What You Need Before Starting Sewage Pump Installation
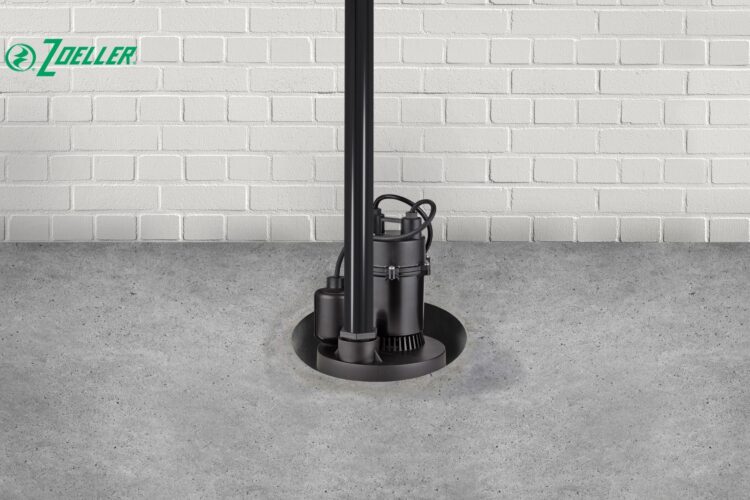
Solid preparation keeps the work on schedule and prevents errors on site. Confirm tools, materials, and basin conditions before starting.
Tools and Materials for Sewage Pump Fitting
Gather the following before beginning:
- Submersible sewage pump, correctly sized for flow rate and total head
- PVC discharge pipe and fittings sized to match the outlet connection
- PVC primer and solvent cement
- PTFE tape and pipe thread sealant
- Stainless steel safety cable with fasteners
- Pump cable and waterproof submersible splice kit
- Float switch and cable clamps
- Check valve and hose clamps
- Ground fault circuit interrupter (GFCI) for the power supply connection
- Spirit level, pipe wrench, screwdrivers, wire strippers, and tie wraps
Basin and Drainage Checks Before You Fit
Inspect the sump pit or wet well and verify that it meets minimum requirements. The pit must contain a diameter and depth suitable for the submersible pump, with a flat, solid floor. A stable, level surface helps reduce vibration and extends bearing life.
The liquid level inside the basin must cover the unit housing throughout the operating cycle. If it drops below the housing, the unit overheats and fails. Plan level control settings to maintain safe coverage and protect the unit from damage. Check the power supply circuit for correct voltage, proper GFCI protection, and a clear cable run to the pit.
How to Install a Submersible Sewage Pump
Read through the complete article before starting. The following steps apply to both mobile and auto-coupling installation methods.
Step 1: Position the Sewage Pump in the Pit
Lower the sewage pump into the basin. Place it on the pit floor and use a spirit level to confirm it sits flat: an unlevelled unit causes vibration that wears the shaft seals over time. Use an anti-vibration mounting pad if the floor is uneven. Confirm the inlet faces downward and is clear of debris. Correct initial position is essential for stable, long-term operation.
Step 2: Connect and Install the Discharge Pipe
Fit the PVC discharge pipe to the outlet using the correct adapter. Apply PTFE tape to all threaded joints and use primer and solvent cement on push-fit connections. Allow cemented joints to cure for at least 30 minutes before applying water pressure.
Instal a check valve on the discharge line immediately above the unit. Without a check valve, wastewater will drain back into the basin each time the unit cycles off, causing water hammer and increasing wear. Secure the discharge pipe with brackets to reduce stress on the outlet connection and prevent movement under system pressure.
Step 3: Attach the Safety Cable and Dress the Pump Cable
Fasten a stainless steel safety cable to the unit’s lifting eye before completing any other connections. The safety cable bears the full weight of the unit during extraction (the pump cable must never carry this load). Thread the safety cable to the surface and anchor it to a fixed point above the basin. Route the pump cable alongside and secure both with tie wraps, keeping them clear of the pipework.
Step 4: Wire the Pump Motor and Power Supply
All electrical work must comply with local wiring regulations. Connect the terminals using a waterproof submersible splice kit: standard junction boxes must not be used in wet conditions.
For single-phase units rated below 1 HP, run the live wire through the float switch so it controls the circuit directly. For larger units requiring a contactor, use the float switch signal to trigger the relay, with the unit powered through the contactor. Run the neutral and earth wires from the power supply panel directly to the unit without interruption. Confirm GFCI protection is in place and plug the power lead into the GFCI socket before energising.
Step 5: Set the Float Switch to Pump Wastewater Safely
The float switch automatically activates the unit to pump wastewater when the level rises to the upper trigger point, and stops it when the level drops to the lower set point. The free cable length between the trigger weight and the switch body sets the operating band: a longer free section gives a wider range and reduces start-stop cycles, lowering motor wear.
Mount the float switch on a fixed bracket inside the basin, away from the pipework and basin wall. Adjust the lower set point so the unit stops before the liquid level drops below the housing mid-point, this prevents dry-running and protects the unit from damage. Tighten all cable clamps to keep the level control stable and calibrated accurately.
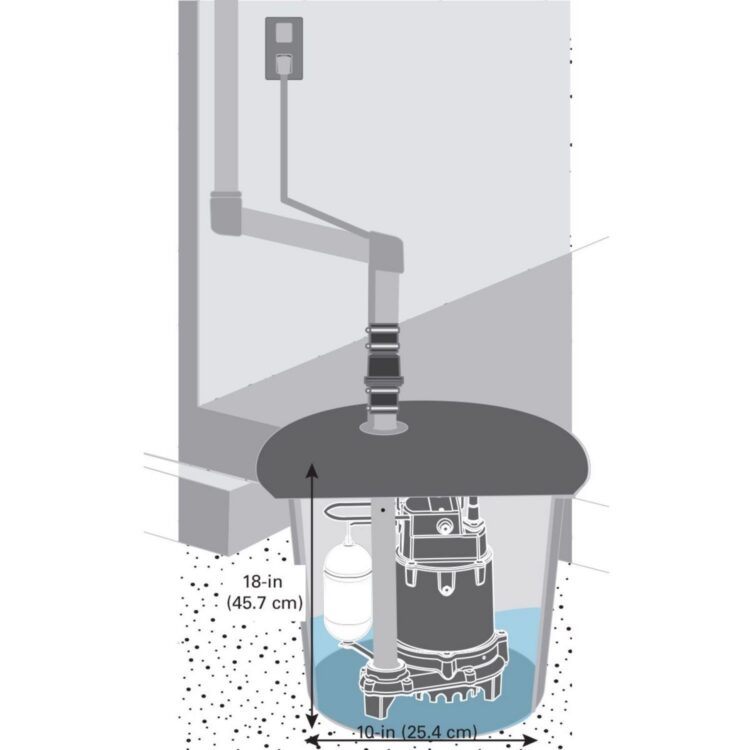
Step 6: Auto-Coupling (Guide Rail) vs. Mobile Fitting
Units are fitted using two standard methods: auto-coupling and mobile.
In auto-coupling fitting, the unit slides down a guide rail and locks onto a fixed base bracket connected to the pipe network to pump wastewater out. This allows it to be lifted and lowered for servicing without entering the wet well, the right approach for permanent commercial and industrial sewage water pump installations.
In mobile fitting, the unit sits freely on the basin floor with a flexible discharge hose. This suits temporary or portable drainage applications and is common in domestic applications. Secure the hose with clamps and confirm it is rated for the operating system pressure.
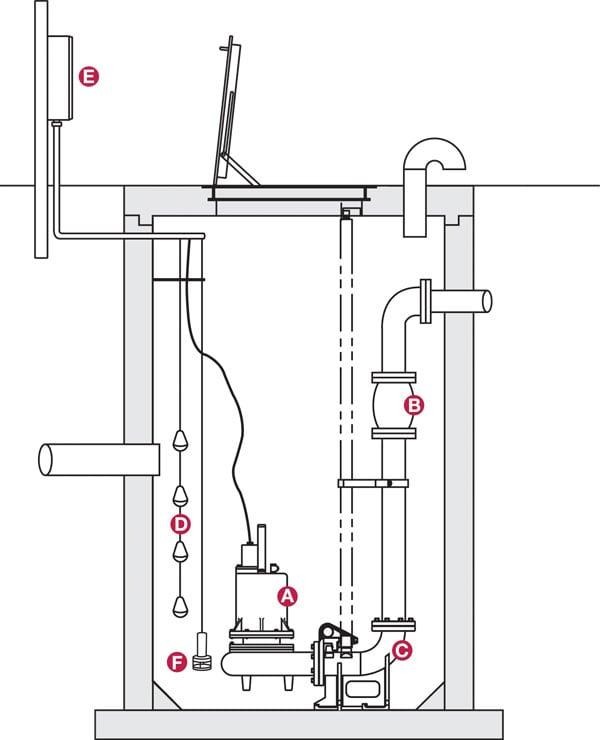
Commissioning and Maintenance of Your Sewage Pump System
Once connections are complete, follow these commissioning checks before putting the unit into service:
- Fill the basin to the upper activation level.
- Energise the circuit and confirm the unit starts automatically.
- Check that water flows through the discharge pipe with no leaks at any joint.
- Allow the unit to cycle off at the lower set point and confirm it stops cleanly.
- Verify the check valve is holding: no backflow should be audible after the unit stops.
- Confirm the safety cable is secured and the pump cable is not under tension.
Record the operating current and compare it to the nameplate full-load amperage. Current significantly above the nameplate value indicates a blockage, incorrect voltage, or a mechanical fault. Regular servicing (clearing inlet screens, inspecting the pump cable and verifying the controller movement) should be performed every six to twelve months. Proper servicing will provide a system that runs efficiently.
Common Sewage Pump Installation Mistakes and How to Avoid Them
Float switch set too low: the unit runs dry, the motor overheats, and it fails. Always set the lower limit above the housing mid-point.
No check valve fitted: wastewater will drain back into the basin each cycle, increasing wear and reducing performance. Always install a check valve immediately above the outlet.
Pump cable used as a lifting line: the jacket tears, water ingresses at the splice, and the unit fails. Always use a dedicated stainless steel safety cable.
Basin too small for the flow rate: insufficient tank volume means the unit short-cycles, switching too rapidly, overloading the unit and reducing performance. A properly sized tank should handle at least four to six starts per hour. The root cause of most short-cycle failures is an undersized basin.
Cemented joints tested too early: PVC solvent cement needs at least 30 minutes to cure. Pressurising joints too soon causes leaks that are difficult to seal and repair once the plumbing system is under load.
Incorrect power supply voltage: mismatched voltage causes damage to the unit immediately on start-up. Always check the power supply voltage against the nameplate before wiring. Look for a clear voltage rating label on the housing before connecting to the supply.
Frequently Asked Questions About Sewage Pump Installation
Can I install a submersible wastewater pump myself?
For small residential sump applications, a competent DIY installer can complete a mobile fitting. However, three-phase wiring, auto-coupling rail systems, and commercial wet well work should be handled by a qualified electrician and plumber. Local regulations may require certified work for these applications.
How deep should a sewage pump be positioned in the basin?
The unit should sit on the basin floor with the housing fully submerged during operation. The minimum liquid level must remain at or above the housing mid-point to ensure adequate cooling. The lower set point controls this minimum, set it to maintain proper coverage and prevent dry-running.
What is the difference between a sewage water pump and a wastewater pump?
The terms are often used interchangeably. A sewage pump handles raw sewage containing solid waste and is built to pass solids up to a specified diameter. This pump type is designed for more demanding applications than a standard wastewater pump, which handles grey water and lightly contaminated drainage from sinks and showers. Choose the right sewage water pump specification for your application based on the solid content and drainage load.
How do I maintain a submersible sewage pump?
Routine maintenance includes clearing the inlet of clog-causing debris, inspecting the pump cable and safety cable, and verifying that switch travel is unobstructed. Confirm the unit runs efficiently by measuring operating current against the nameplate. Scheduling regular servicing every six to twelve months reduces the risk of unexpected failure and keeps the system performing reliably throughout its design life. Consult local sewage treatment and plumbing standards for any additional maintenance requirements.
For techaical ensues contact the Zeeller Vietnam team at vn.zoeller.com. Always request the full model datasheet, IOM manual and warranty documentation before purchase.
You might also like: Complete Guide to Wastewater Pump Types and Their Applications




 English
  简体中文
简体中文  Tiếng Việt
  繁體中文
繁體中文  한국어
한국어  日本語
日本語